

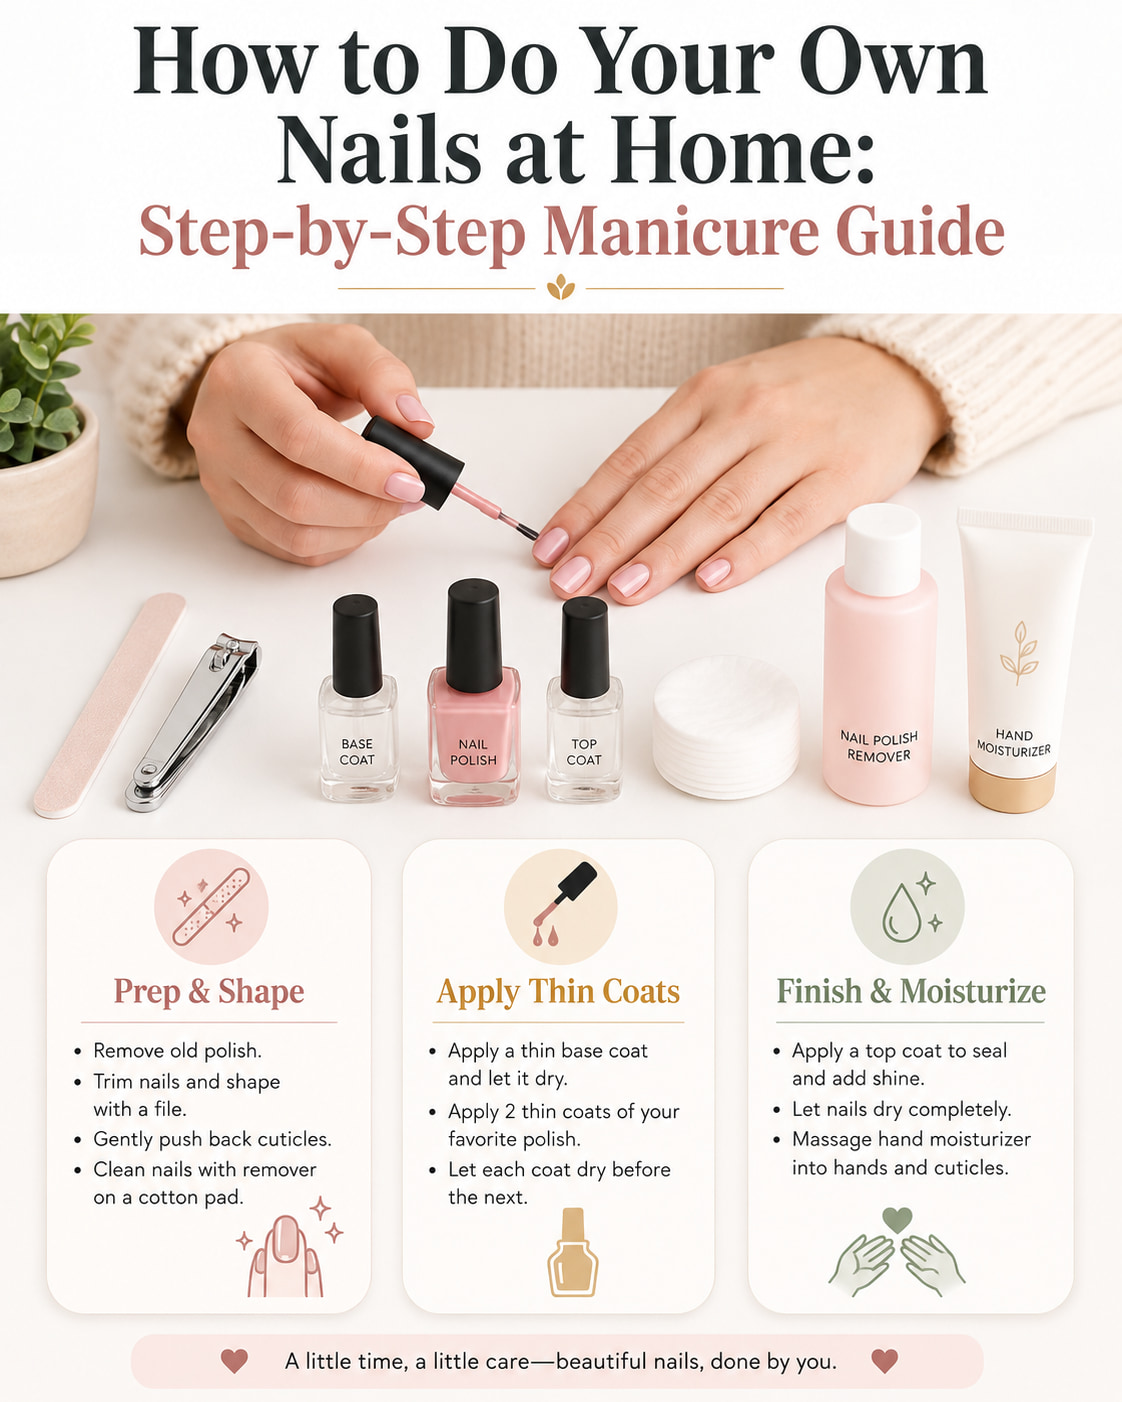
You can do your own nails at home by removing old polish, gently shaping your nails, caring for the cuticle area, cleaning the nail surface, and applying thin layers of base coat, color, and top coat. You do not need professional equipment for a neat basic manicure.
Good technique matters for more than appearance. Aggressive filing, cutting healthy cuticles, applying very thick polish, or peeling off gel can leave nails more vulnerable to dryness, splitting, irritation, or infection.
This guide focuses mainly on a regular nail polish manicure, which is the simplest option for beginners. It also explains what to know before using gel products at home.
What You Need to Do Your Own Nails at Home
You can create a basic manicure with a small set of supplies:
- Nail polish remover
- Cotton pads or lint-free wipes
- Nail clippers
- Nail file or emery board
- Base coat
- Nail polish
- Top coat
- Hand moisturizer
- Cuticle oil, optional
- Small cleanup brush, optional
A nail buffer is also optional. If you use one, buff lightly rather than repeatedly thinning the surface of the nail.
Try to work at a table with good lighting and ventilation. Keep polish, remover, and other nail products away from flames or heat.
How to Do Your Own Nails at Home Step by Step
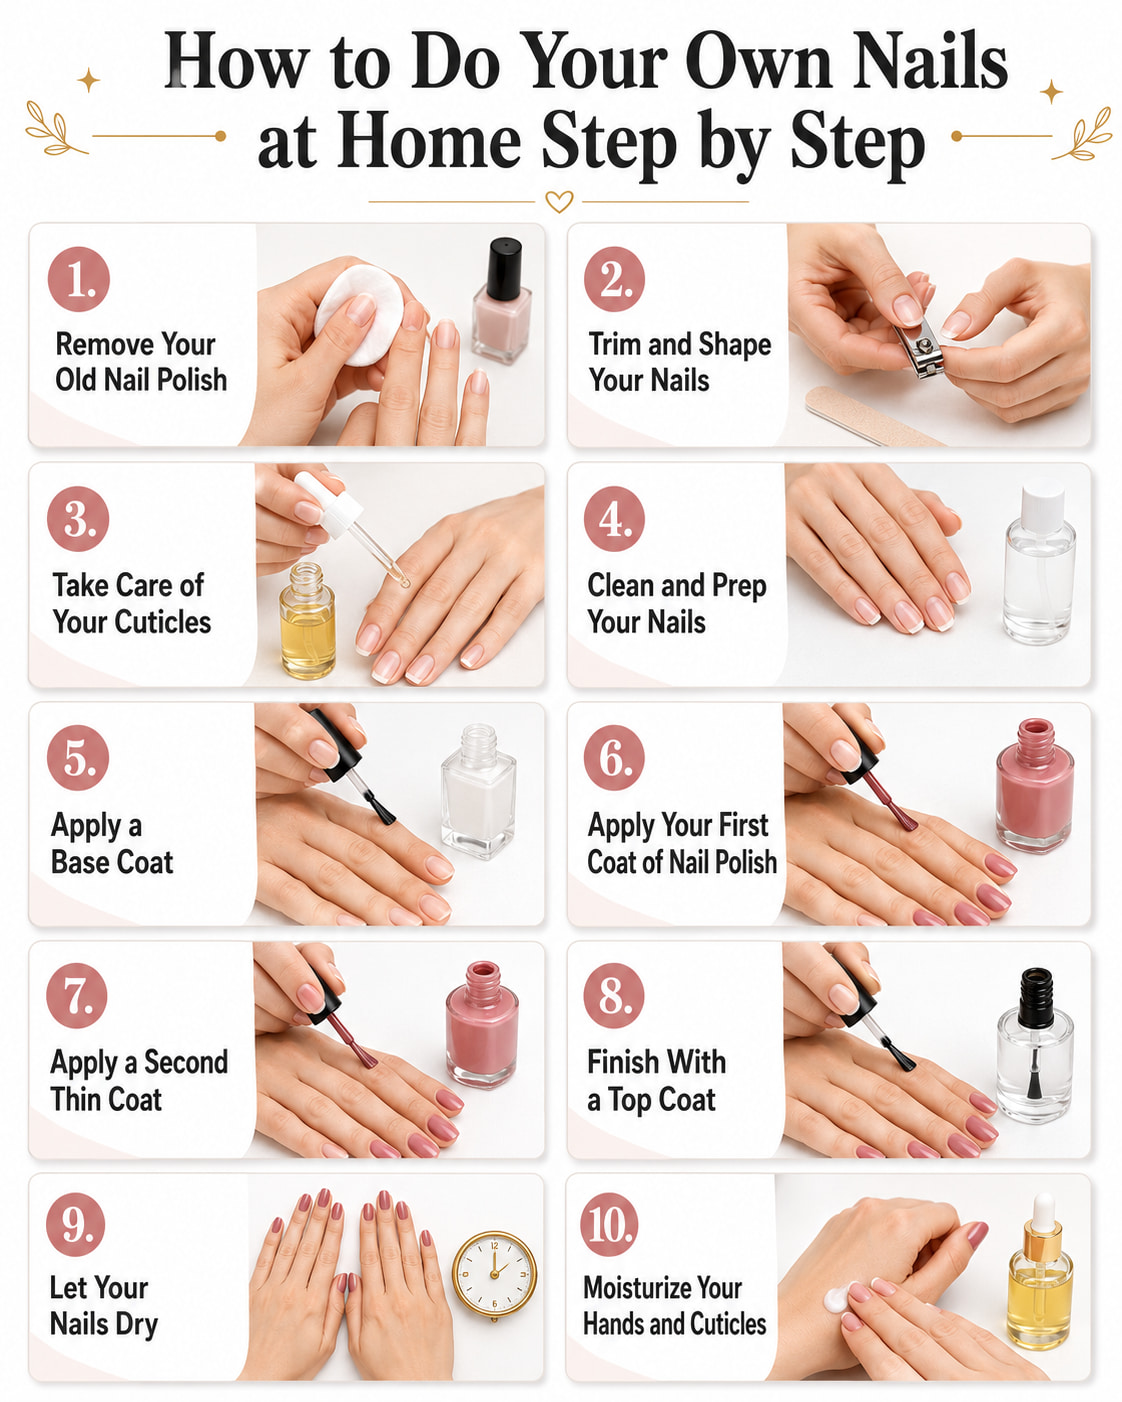
Give yourself enough time that you will not have to rush the polishing and drying stages.
1. Remove Your Old Nail Polish
Start with bare nails.
Apply nail polish remover to a cotton pad and wipe each nail until the old color is gone. For stubborn polish, hold the remover-soaked pad against the nail briefly before wiping instead of scrubbing aggressively.
Wash your hands afterward if needed and dry them thoroughly.
Take a quick look at your natural nails before covering them again. Persistent unusual discoloration, swelling, pain, or significant nail separation should not simply be hidden under another coat of polish.
2. Trim and Shape Your Nails
Clip your nails only if you want to shorten them.
For basic nail care, the American Academy of Dermatology recommends cutting fingernails almost straight across and then slightly rounding the corners with a nail file.
You can adjust the finished shape to your preference.
Common options include:
- Round: practical for shorter nails
- Oval: softly tapered at the sides
- Square: straight sides with a flatter tip
- Squoval: square with softened corners
- Almond: tapered and rounded, usually better suited to longer nails
File gently until the edge feels smooth. Avoid aggressively sawing at the sides of the nail, which can make the edges thinner and more prone to damage.
3. Take Care of Your Cuticles
You do not need to cut your cuticles to get a clean-looking manicure.
The cuticle helps protect the area where the nail grows. The American Academy of Dermatology advises against cutting or aggressively pushing back cuticles because damaging this protective barrier can contribute to irritation or infection.
For simple home care:
- Apply a little moisturizer or cuticle oil if the area is dry.
- Let it soften briefly.
- If necessary, gently move back loose excess tissue without forcing it.
- Leave healthy attached cuticle tissue intact.
Avoid digging underneath the nail fold or cutting deeply around the nail.
4. Clean and Prep Your Nails
Polish generally adheres better to a clean, dry nail surface.
After shaping and cuticle care:
- Remove nail dust.
- Make sure the nail plate is dry.
- Wipe away cream or cuticle-oil residue from the nail itself.
- Avoid leaving fibers from cotton or towels on the surface.
You can moisturize again after the manicure is finished.
You also do not need to soak your fingertips for a long time before polishing. A simple clean-and-dry preparation is enough for most home manicures.
5. Apply a Base Coat
Apply one thin layer of base coat over each nail.
Start close to the cuticle without touching the surrounding skin, then brush toward the tip.
A base coat can help create a smoother surface and improve how the color applies. It can also help reduce staining from strongly pigmented polish.
Give it time to set according to the instructions on your particular product.
6. Apply Your First Coat of Nail Polish
Before painting, gently roll the bottle between your hands if the polish needs mixing. Vigorous shaking can sometimes introduce unnecessary air bubbles.
Remove excess polish from one side of the brush.
Then apply a thin coat:
- Place the brush slightly above the cuticle.
- Push gently toward the cuticle without touching the skin.
- Pull the brush toward the nail tip.
- Paint one side.
- Paint the other side.
A simple three-stroke approach—center, one side, then the other—is often easiest for beginners.
Do not worry if the first coat looks slightly sheer. A thick first coat is more likely to become uneven, wrinkle, or take a long time to dry.
7. Apply a Second Thin Coat
After the first layer has had time to set, apply a second thin coat.
This is usually where the polish reaches its intended color and opacity.
Try to:
- Use smooth, controlled strokes.
- Avoid repeatedly brushing over polish that has already started to set.
- Keep polish slightly away from the surrounding skin.
- Cover the entire nail evenly.
Some very sheer formulas may need an additional layer, but more coats also mean more drying time. Follow the instructions for your specific polish when possible.
8. Finish With a Top Coat
Once the color has set sufficiently, apply a thin, even layer of top coat.
Top coat can:
- Add shine or a specific finish
- Smooth the appearance of the color
- Protect the polish surface
- Help delay normal chipping
You can lightly run the brush across the free edge at the end of the nail. This is often called capping the edge.
Do not overload the brush. A very thick top coat can make the manicure slower to dry.
9. Let Your Nails Dry
A common home-manicure mistake is assuming polish is fully dry simply because the surface no longer feels wet.
Drying time varies significantly depending on:
- Polish formula
- Number of coats
- Thickness of each coat
- Temperature and airflow
- Whether a quick-dry top coat is used
Keep your hands relatively still while the polish sets and avoid activities such as:
- Showering
- Washing dishes
- Buttoning tight clothing
- Opening cans
- Digging through bags
- Going to bed immediately after painting
Thin coats usually make this stage easier.
10. Moisturize Your Hands and Cuticles
Once the polish is sufficiently set, apply hand cream and, if you like, a small amount of cuticle oil around the nails.
Moisturizing is especially useful after exposure to polish remover, which can leave the surrounding skin and nails feeling dry.
Keep moisturizer on the skin and cuticle area rather than applying oily products to the nail plate immediately before your next manicure.
How to Paint Your Nails Without Making a Mess
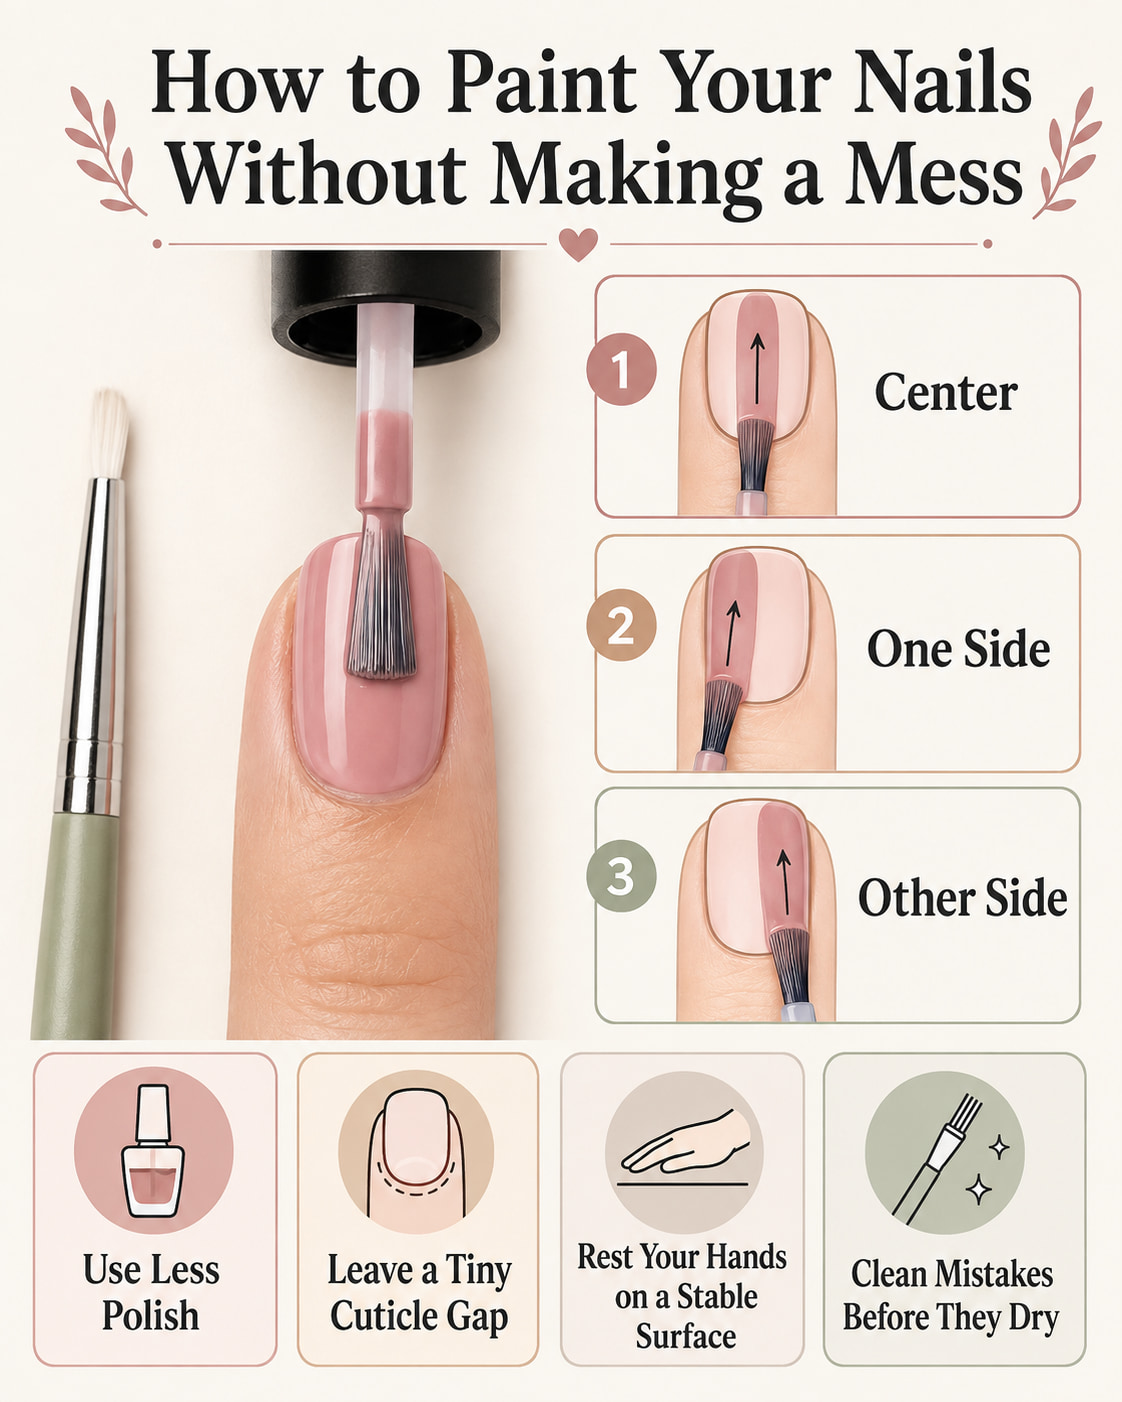
Neat nail polish application becomes easier with practice, but a few techniques help immediately.
Keep the brush lightly loaded
Too much polish is harder to control and is more likely to flood the cuticle or sidewalls.
Leave a tiny gap around the cuticle
You do not need to paint all the way onto the skin. A very small clean border often makes the manicure look more precise.
Paint your dominant hand first
If you are right-handed, consider painting your right hand first with your less-coordinated left hand while you are fresh and patient. Then use your dominant hand for the easier side.
Rest both hands on a stable surface
Keeping your elbows or wrists supported reduces shaking.
Clean mistakes before they fully dry
For ordinary polish, a small cleanup brush lightly dampened with remover can help correct polish around the nail.
Try not to repeatedly expose large areas of surrounding skin to remover.
How to Make an At-Home Manicure Last Longer
Even regular polish can last better when the nail is prepared and protected properly.
Start with clean nails
Cream, oil, dust, or old polish residue may interfere with adhesion.
Keep your coats thin
Several controlled thin layers usually perform better than one very heavy layer.
Use base and top coats
They give the color layers a more complete manicure system rather than leaving pigment directly exposed.
Protect your hands from prolonged water exposure
Repeated wetting and drying can make nails more prone to splitting and peeling.
Wear household gloves when:
- Washing dishes
- Scrubbing bathrooms
- Using cleaning products
- Doing prolonged wet household work
Do not use your nails as tools
Avoid using your nails to:
- Pry open lids
- Scrape labels
- Open cans
- Pick at hard surfaces
These habits can chip polish and can also damage the natural nail.
Moisturize regularly
Apply moisturizer after handwashing when your hands or nail area feel dry.
Common At-Home Manicure Mistakes
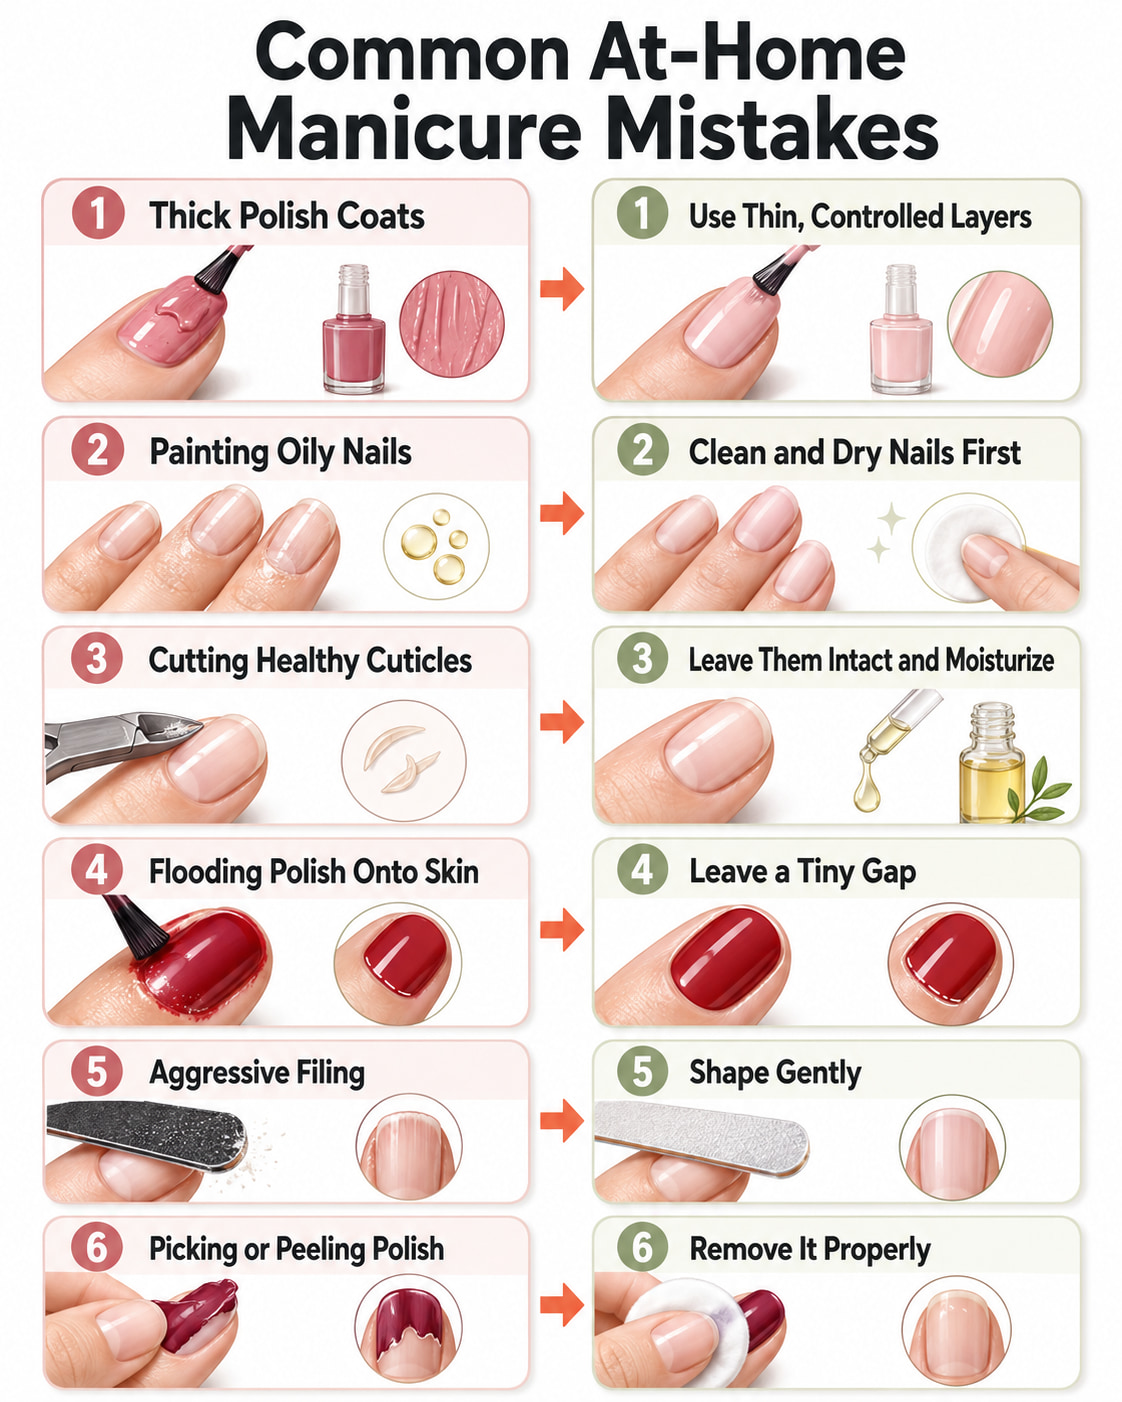
| Mistake | What to Do Instead |
|---|---|
| Applying one very thick coat | Apply thinner, controlled layers |
| Painting oily nails | Clean and dry the nail plate first |
| Cutting healthy cuticles | Leave them intact and moisturize |
| Flooding polish onto the skin | Leave a tiny gap around the nail |
| Filing aggressively | Shape gently and stop when smooth |
| Picking or peeling polish | Remove it with the appropriate remover |
| Doing chores immediately after polishing | Give the manicure time to set |
| Using nails as tools | Use an actual opener or scraper |
| Skipping moisture after removal | Apply hand cream or cuticle oil |
Nail Product Safety at Home
Even ordinary manicure products should be used carefully.
The U.S. Food and Drug Administration recommends reading cosmetic nail-product labels and following all warnings and directions.
For safer home use:
- Work in a well-ventilated area.
- Keep products away from flames and heat.
- Avoid getting nail products in your eyes or mouth.
- Minimize unnecessary skin contact.
- Keep products away from children.
- Stop using a product if it causes significant irritation, swelling, itching, or another suspected reaction.
Some nail hardeners may contain ingredients such as formaldehyde. The FDA notes that frequent use of certain formaldehyde-containing hardeners can actually make nails brittle or more likely to peel or break.
More product is not always better.
What About Doing Gel Nails at Home?
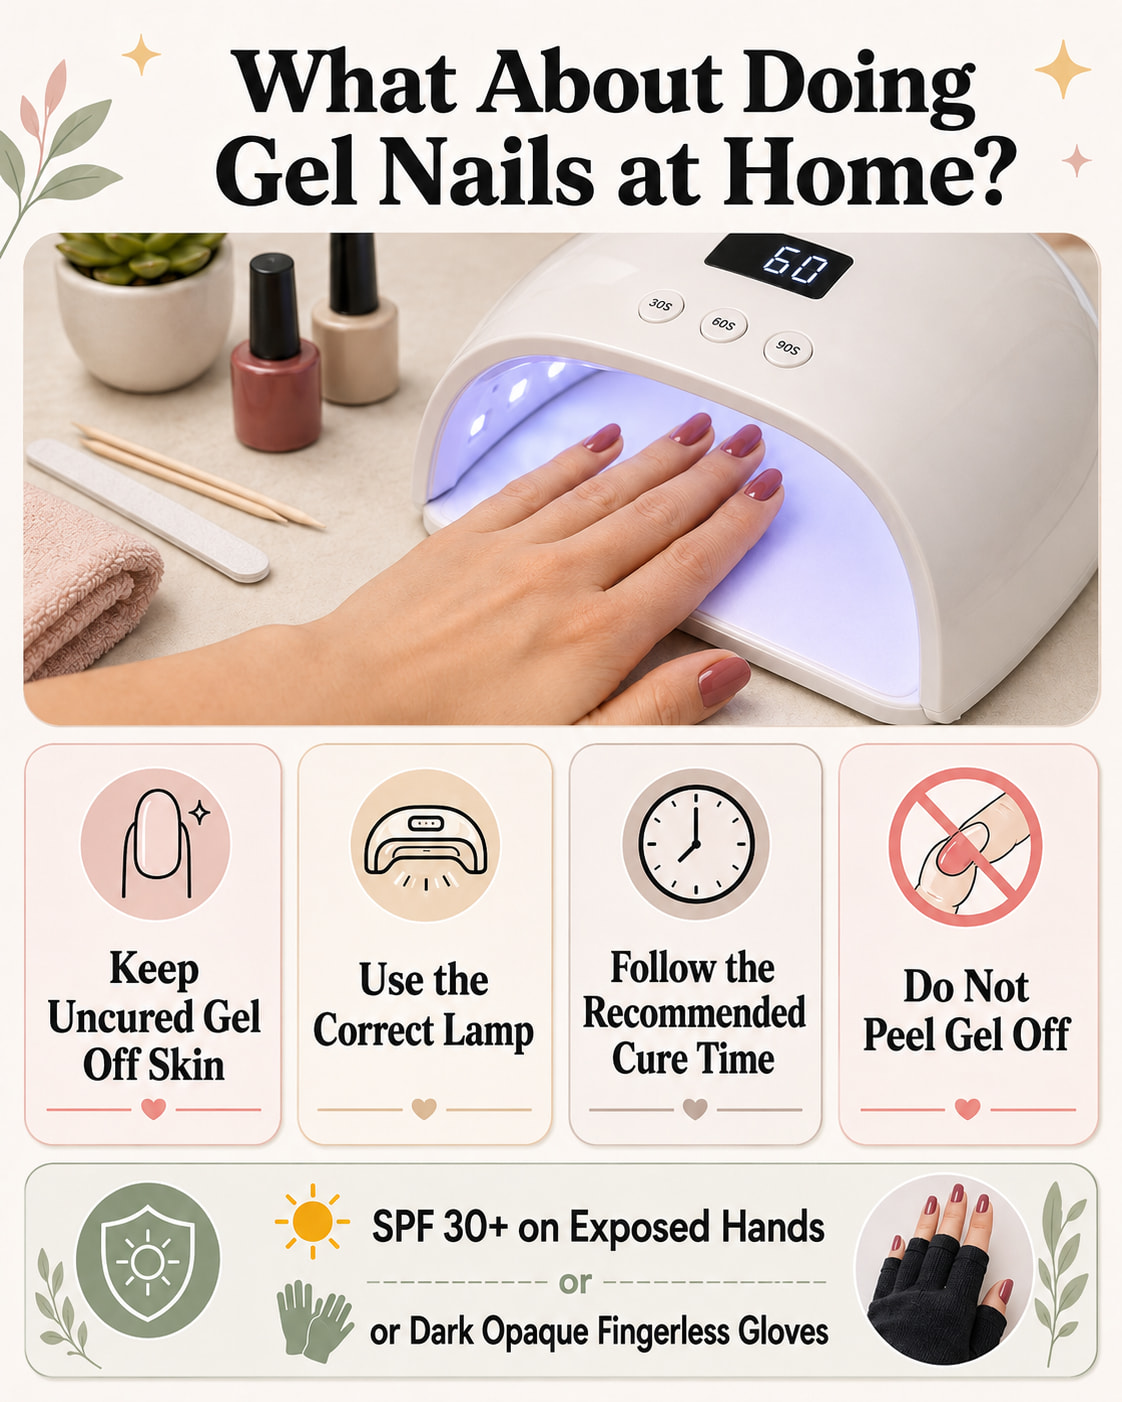
You can buy home gel systems, but gel polish requires additional precautions that ordinary air-dried polish does not.
Gel needs proper curing
Gel products contain ingredients designed to cure under a compatible lamp. Using the wrong lamp, incorrect curing time, or excessively thick layers may leave some product inadequately cured.
The British Association of Dermatologists warns that uncured gel and artificial nail products can contribute to acrylate sensitization, particularly when the product repeatedly touches the skin.
If you use a gel system at home:
- Use products and lamps according to the manufacturer’s directions.
- Do not mix incompatible systems unless the manufacturer says you can.
- Keep uncured gel off your skin.
- Use thin, controlled layers.
- Cure for the full recommended time.
- Stop using the product if you develop persistent itching, swelling, blistering, or irritation around the nails.
UV lamp exposure
Gel-curing lamps expose the hands to ultraviolet radiation.
For people who regularly get gel manicures, the American Academy of Dermatology recommends applying a broad-spectrum, water-resistant SPF 30 or higher sunscreen to exposed skin on the hands before the manicure, or wearing dark opaque fingerless gloves designed to protect the skin while leaving the nails exposed.
Regular nail polish does not require UV curing, so it is the simpler option if you just want an occasional DIY manicure.
How to Remove Nail Polish Safely
Regular nail polish
Use a remover intended for ordinary nail polish.
- Saturate a cotton pad with remover.
- Hold it against the nail briefly if the polish is stubborn.
- Wipe gently.
- Repeat as needed.
- Wash your hands.
- Apply moisturizer afterward.
Try to avoid aggressively scraping color from the nail.
Gel polish
Do not peel gel polish off.
Peeling can remove superficial layers of the natural nail along with the coating.
Instead, follow the exact removal instructions for your gel system. Some products require the surface to be gently filed before acetone removal.
When acetone soaking is needed, the American Academy of Dermatology recommends limiting acetone exposure mainly to the nails rather than soaking the entire hand. Acetone-soaked cotton placed directly on each nail can reduce unnecessary skin exposure.
Moisturize afterward.
When to Leave Your Nails Bare and See a Dermatologist
A cosmetic manicure should not be used to hide an unexplained nail problem indefinitely.
Consider getting medical advice if you notice:
- Increasing pain or tenderness
- Redness or swelling around the nail
- Pus or drainage
- A nail separating significantly from the nail bed
- Persistent unexplained nail discoloration
- New dark streaks or spots
- Significant thickening or distortion
- Nail changes that continue despite basic care
- A suspected allergic reaction to nail products
A dermatologist can help determine whether a change is related to irritation, trauma, infection, a skin condition, or another cause.
Frequently Asked Questions
Can beginners do their own nails at home?
Yes. A basic manicure using regular polish is beginner-friendly. Start with simple shaping, avoid cutting the cuticles, and use thin coats rather than trying complicated nail-art techniques immediately.
How many coats of nail polish should I apply?
For many regular polishes, two thin color coats provide an even finish. Use one base coat beforehand and a top coat afterward. Very sheer formulas may require another color layer.
Should I soak my nails before doing a manicure?
Long soaking is not necessary for a basic polish manicure. Clean, dry nails are usually preferable when you are ready to apply polish because excess water or oil can interfere with application.
Should I cut my cuticles when doing my own nails?
Generally, no. Healthy cuticles provide a protective barrier around the growing nail. Moisturize them and, if necessary, gently move loose softened tissue rather than aggressively cutting or scraping the cuticle area.
Why does my nail polish chip so quickly?
Common causes include oily nail surfaces, very thick polish layers, inadequate drying time, frequent exposure to water, and using the nails as tools. Proper preparation, thin coats, and a top coat can help.
Is it safe to do gel nails yourself?
Home gel manicures require more care than regular polish. Avoid getting uncured gel on your skin, use the correct curing lamp and timing for your product system, and follow the manufacturer’s removal instructions.
How often should I give my nails a break from polish?
There is no universal schedule that everyone needs to follow. If your nails become brittle, peeling, sore, unusually dry, or irritated, removing the coating and allowing the nail and surrounding skin to recover can be sensible. Persistent changes should be assessed by a dermatologist.
Conclusion
Learning how to do your own nails at home does not require professional skills or an expensive manicure kit. Focus on gentle shaping, intact cuticles, a clean nail surface, thin layers of polish, enough drying time, and regular moisturizing.
If you are new to DIY manicures, start with ordinary nail polish before experimenting with more complicated gel systems. Good nail care should leave your nails looking polished without sacrificing the health of the natural nail underneath.
References
- American Academy of Dermatology — Healthy Nail Tips
- American Academy of Dermatology — Manicure and Pedicure Safety
- U.S. Food and Drug Administration — Nail Care Products
- British Association of Dermatologists — Artificial Nail and At-Home Kit Safety
This content is for informational purposes only and not medical advice.